DIY

All Natural Playdough (original post from 2014)

PJB_photoplaydoughrecipe.jpg

Looks like it’s been 6 years since I’ve made playdough! This recipe is from my original blog, and Laly asked me the other day if we could make some, which we will do this week. I remember the colours being so vibrant, so I’m looking forward to trying this out again.

I thought I’d repost it here so it’s easy to find.

Here is the original post…

February 4, 2014 (Laly was almost 2 years young):

So I've been having a bit of fun making all natural play dough lately. This batch of coloured fun is my third or so experiment and I'm rather happy with it. Though I've got some ideas for the next batch which I'll share with you in case you'd like to try.

Since I want to use only natural colour, I've adapted this recipe from best recipes, minimizing quantities and introducing soaking selected ingredients to create coloured water. Here is my adapted recipe:

1 cup plain flour
1/2 cup salt
1/2 tablespoon (or so) of cooking oil (i've been using sunflower)
1/4-1/2 cup of cold, coloured water

To make the coloured water, soak a handful of your chosen ingredient (spinach for green, beetroot for deep purple, mixed frozen berries for rose/light purple) in a ramekin or glass container of 1/2cup water, preferably overnight. Strain the liquid and pop it in the fridge for a little while to make it cold, or add an ice cube.

In a large bowl, mix the flour and salt together well. At this stage if you are making yellow, add a good sprinkling of tumeric powder. Then add the cooking oil and 1/4cup of coloured water. Mix then knead until well combined. Add more water if needed to get the right consistency.

....................................................

I then put each ball of play dough into clear, recycled plastic containers and leave them in the back of the fridge. To allow them to soften slightly, I take them out about 1/2 hour before we are ready to play with them  (yes, WE - Laly and I both love playing with play dough - yesterday I made a fantastic collection of funny looking dinosaurs which Laly promptly invited all to a tiny tea party). This batch was a little crumbly when I took them out, so I just added splashes of water and kneaded them a bit more and they were perfect. Adding flour and water makes playing with it all the more fun for Laly, so I don't mind if I don't get the consistency spot on when I make them. And yes, the colours do come off ever so slightly when you play with them, but barely - and honestly, who cares? It washes off with a dab of a cloth.

The other thing I'd like to say is that I soaked beetroot skins in some water overnight, hence the gorgeous intense colour. However I didn't soak the spinach or the mixed berries but next time I will to get more intense colour, though if you like it subtle, soak for less.

My last batch of yellow and rose lasted many months - basically until the colours get all smooshed together and the ball diminishes to a tiny size, as happens when little hands get hold of it.

I hope you'll give this a try. I can't wait to try out more ingredients for more colours!  Any suggestions?

xx


The Ever-Evolving Wreath Tutorial...

My ever-evolving wreath for 2018: it’s wild & free, like my heart.

My ever-evolving wreath for 2018: it’s wild & free, like my heart.

How are you feeling as we near the end of the year? The frenzied energy is well & truly upon us! For those like me, who feel… what’s the word… resistant? Yes, that’s what it is for me - resistant…we might feel inclined to retreat and search for solace at this time amidst all the busy-ness. That is what compelled me to write my new book Festive Season Reimagined - to find ways to reconnect with our inner strength, resilience and joy. That’s our intuition - it’s something we all have, something that no one or no thing can take from us: it’s our heart, our jewel, and I absolutely love supporting people in finding their heart and letting it take the lead in making their everyday decisions. It’s a way of life that is unique to you and when you are living it, you’ll know. It’s a wonderful feeling.

PiaJaneBijkerk_everevolvingwreath2018_3.jpg

Last week Diana Moore from Home Beautiful wrote a lovely post about Festive Season Reimagined, featuring an extract on the “ever-evolving wreath”. If you have signed up for my emails and instagram after reading the Home Beautiful post, welcome! I then posted on social media a photograph of my ever-evolving wreath for 2018. It took me only a few minutes to make, and it now adorns the front door. I asked if anyone would like a tutorial and the answer from many was yes. Then I realised what I’d said!

One, I’m not great at tutorials because I work in such a free-flow way and two, it’s the end of the year and life is hectic enough! But it is so much fun to make these wreaths and it’s one of the most effective ways to connect to our intuition, the nature around us and embark on the journey of reflection, so here it is, my super simple tutorial which is just as much a tutorial on intuitive play than it is making the wreath. I’m a 3-stepper, which means whatever I create needs to fit into 3 easy steps because anything more I find we lose our intuitive connection. So, are you ready?

STEP ONE: FINDING…

Find yourself a loop of some sort - it can be a discarded embroidery hoop, a piece of heavy wire that can be looped (even a coat hanger pulled into a round shape, leaving the hook at the top for easy hanging), a bendable branch, anything at all. This one I have is the top of an old basket that someone had thrown away. I love the organic shape of it…

PiaJaneBijkerk_everevolvingwreath2018_4.jpg

The other part of the FINDING is to collect your botanical materials! Find something in abundance that can be the backdrop for your wreath. This year, I decided not to go with green as the backdrop and instead was inspired by a dried up patch of seeded grass in our neighbourhood, a place we have walked by hundreds of times this year, never thinking much of it until I began looking more closely at the flora along the walk to school and found the beauty in it. What can you see when you walk in your neighbourhood?

PiaJaneBijkerk_everevolvingwreath2018_6.jpg

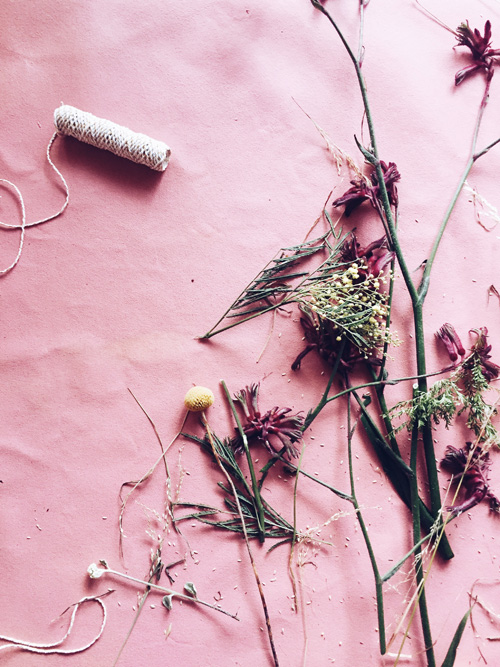
I picked big handfuls of it for the wreath, and also gathered whatever else touched my heart - some beautiful wattle, a few kangaroo paw, golden reeds, flowering lemon verbena, and the star of the wreath: a branch of fuchsia bougainvillea. Then I found some ribbon to hang it with, a few bits of string and my scissors…

PiaJaneBijkerk_everevolvingwreath2018_5.jpg
PiaJaneBijkerk_everevolvingwreath2018_7.jpg

STEP TWO: ASSEMBLING

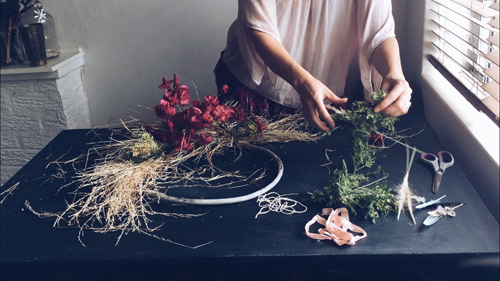
So for the assembling, I gathered the grass into three bundles. I wanted to have an off-centre wreath, allowing the basket loop to be exposed, so 3 bundles is all I needed, but if your heart wants to have a full covered wreath then you just create more bundles! With the 3 bundles, I tied them onto the loop with string. No fancy floral wire required, just use what you have on hand. And don’t be too precious, perfect or neat. I find the quicker you work the better, otherwise you start to overthink it and criticise your work - if you realise you’re doing that, let those thoughts float away like clouds - there is no place for them here!

PiaJaneBijkerk_everevolvingwreath2018_8.jpg
PiaJaneBijkerk_everevolvingwreath2018_9.jpg

Use the grass bundles as well as the string you’ve used to attach the bundles to the loop as your place of attaching the accent pieces - just stick those pieces into the string and thick grass, it will hold them in place and if it doesn’t, tie a bit more string around to hold it in place. You can keep adding foliage to cover the string until you are happy with it.

STEP THREE: REVIEW

For this step, you need to hang it up either in the place you want it to go, or just on the wall with some tape so you can step away and see it in place. When you step away, you’ll see some empty areas, or you’ll see where you need to tweak the foliage or add more foliage. As my main art medium is photography, I tend to ‘look’ through the lens so to speak, when I look at something I’ve just created - not literally, just in my mind… it’s an automatic thing for me from years of working in photography, but what might help for you is to put your hands up in front of you in the shape of a square camera lens, to allow you to block out all other distractions around the wreath and see it ‘through the lens’. You could also cut a square or rectangular piece of cardboard out of a larger piece of cardboard to act as your ‘review lens’. It might sound silly but it honestly works! It just helps you to focus on what you’ve created and not get caught up in what else is going on around.

When you step back, you may also see bits of grass hanging loose and out of place, so grab your scissors to cut those bits off - don’t pull them, just cut them, otherwise you might end up pulling large chunks out of place. Again, I tend to be loose and free here, not making it too neat, because the beauty is in the freedom (as it is in living whole-heartedly)…

PiaJaneBijkerk_everevolvingwreath2018_1.jpg

After I hung mine in place on the front door, we had a huge storm sweep through the area, but it held up well, there were a few bits loose but I just pushed them back into place. And I still add to it when I see something I like, that’s why I call it ever-evolving, because it’s something you can continue to play with over the season.

I’ve posted more about the making of this wreath in my stories on instagram if you’d like to check it out, my handle is @piajanebijkerk, here it is.

In book news, Festive Season Reimagined sold out of its first print run in less than a month! A huge thank you to everyone who purchased a copy last month. I’ve ordered the second print run which will be ready in the next week or so, for those who are patiently waiting with your orders, thank you! And if you’d like to purchase a copy, please click here for all the details.

But for those who really want to read the book now but aren’t feeling patient, you can purchase the ebook. And today, I’ve decided to do a flash sale for the ebook - just for 48 hours, it’s on sale at only $10. So if you’ve wanted the book but haven’t been able to purchase it for whatever reason, here it is now for you in ebook form, at the lowest price it will ever be, please enjoy…

Reflection is a BIG part of growth at this time of year, and I’m delighted to let you know that Shona Smith - my fabulous podcasting pal & I have released a bonus episode for our podcast “It’s All Up From Here”: it’s all about how to reflect on your parenting. It’s a fun, thoughtful, raw & honest episode, I hope you enjoy it, click here and scroll down to the end to have a listen. You’ll also find our last episode of the season there, all about Christmas or as I call it, the Festive Season. Shona and I couldn’t be more opposite in our feelings about this time of year, so if you feel like a laugh, have a listen! And tomorrow, I have another wonderful announcement that is also for your listening pleasure, to get you well and truly inspired to reflect.

And on Patreon, I have uploaded the next piano composition, with another one coming in a couple of weeks - when you join me there, you are able to download all the songs for the year so far to create a playlist designed to connect you to your intuitive heart space, and learn more behind the scenes of what I’m working on and where I am on my personal journeying.

With love,

Pia xx

The Alchemy of Assemblage Workshop 2016

On the afternoon of Sunday, August 27, I hosted my first workshop at the beautiful warehouse of Elements I Love, here in Sydney. After enjoying a few sips of champagne and a chat in the boutique, we lead fifteen wonderful women down the hall, past the antique rocking horse, French cabinets and dress mannequin to draw back the velvet curtain of owner Brooke and Tim's restoration workshop filled with wooden work benches and shelves overflowing with hammers, nails, sandpaper & beeswax. It was so special to be invited to host the event in the workshop itself, it felt like we'd been transported to an alchemist's secret lair. It was a creatively spirited afternoon of learning the alchemy of assemblage while drinking champagne and nibbling on Simmone Logue baked goods and French bread & cheeses. Everyone was eager to get started on their assemblage, it was wonderful to see...

With feathers, strips of vintage textiles, dried ferns leaves, painted sticks, old newspapers, and antique French lace along with the most gorgeous strings from String Harvest and hand dyed silk ribbons from Tinctifolia, everyone gathered the pieces that resonated with them and were soon assembling...

The two hours flew by, and before I knew it, everyone had created something so unique while learning about creative direction and assemblage from me and some woodworking tips from Brooke. It was a lot of fun...

At the end, while I was helping to wrap an assemblage in cloth for transportation, a rainbow of light from a tiny window high up fell on the table beside me, it was a beautiful sign of the magic that was made...

Brooke has written a great wrap up post on her journal, with lots more photos, check it out here

Many thanks to Brooke, Tim, Sarah and the whole team at Elements I Love, my dear friends Kaspia, Louise & Jo, and Zoë from Tinctifolia for supplying the gorgeous ribbon samples, and Cassie from String Harvest for supplying the incredible strings and yarn, Simmone Logue for the food and of course to all the beautiful souls who joined us. 


I will be hosting more Alchemy of Assemblage workshops in 2017, announcing the dates and locations in January. In the meantime if you'd like to express your interest in attending, please email me. 

With Love, 

Pia xx